Showing posts with label 3-D Printing. Show all posts

Friday, November 26, 2010

Which GCode Generator to Use?

Once you have something cool to build in STL format, you have to convert it into GCode format. This is essentially the series of commands the printer needs to be able to print each layer, but there are several different options for tools, so which one should I use?


RepRap Host Software


The RepRap Host Software not only controls the printer, but it will also convert STL files into GCode format. I must admit I haven't spent too much time investigating this as an option for two reasons. Firstly, the host software doesn't appear to work with the Gen6 electronics. The Gen6 sends some messages that the Host Software doesn't understand and I haven't really spent any time trying to figure out what and why. The second reason is that there are lots of parameters to configure and the documentation and forum posts indicate that a lot of it is no longer used. I'm too keen to be printing to figure out what' used and what isn't. Perhaps one day I'll get round too it.


RepSnapper


RepSnapper is another tool that both controls the printer and generates the GCode. It is very quick at generating GCode, although I haven't had much success with build quality with this tool yet. I'm not sure I understand all the configuration options yet.


Skeinforge


A Thing from Thingiverse processed through Skeinforge
Skeinforge is just a GCode generator, but it is incredibly complex. There are lots of configuration parameters allowing you to tweak nearly everything about the build. I've had a lot of success with prints generated from Skeinforge, they are usually very high-quality. It just takes some tuning to get it right. 


My current selection is to use Skeinforge for the GCode generation as it gives me a lot of control and its written in Python, a language I'm much more comfortable manipulating if I need too.  The only downside is it needs some fiddling around to get set-up correctly and the GCode it generates has some commands that Mendel doesn't like, as it expects a PWM driven extruder, not a stepper controlled one. I haven't figured out how to stop it generating these duff commands yet, so I've written a script to remove them. I also don't like the start-up code it creates, so my script fixes that too. 


I then use RepSnapper to control the printer and print the object. Still plenty of tweaking to do, but the results are fairly pleasing so far using PLA.

Poor Stepper Motor Choice

The stepper motors that I'd originally selected from Sparkfun were SM-42BYG011. These had 23NM of torque but it was quite clear that they weren't up to job, especially on the Z-Axis. They couldn't reliably turn the Z-axis and kept stalling out. The other problem was they kept getting very hot (too hot to touch!), in fact the extruder stepper got so hot that it deformed the plastic mounting plate during medium prints. 


As a result I had to change all the stepper motors out. This time round I beefed them up to 42BYGHW811 from Phidgets. No more Z-axis stalls and although the motors do get warm during a long print, they don't get burning hot. The only down side is that the audible chopping frequency is far more noticeable, probably due to the larger coils in the motors.


Next time I'll remember, more power is better! 

The Build Process

It took about 6-weeks to spec out and order all the parts to build my Mendel. The hardest part was finding all the metric parts in the US. McMaster was an invaluable source, but due to the minimum order quantity for most of the fasteners, it worked out to be more cost efficient to order one of the kitted parts from Mendel-Parts. Since I don't know anyone with a Mendel or other 3-D printer, I had to order the RepRapped parts from someone anyway, so it made sense to purchase the rest from there too.
Before: Mendel in Box


The stepper motors I ordered were SM-42BYG011 from Sparkfun, but as I found out later, these weren't up to the job.


The whole build took 2.5 days, including cleaning all the RepRapped parts. I took 3-days of vacation and built the whole thing in one go. It was very therapeutic! 


There were no major issues with the build, everything went smoothly. The biggest issue I had was with the X-carriage. The separation between the bearings was about 4-mm wider than the separation between the X-bars, so the bars were rubbing on the carriage and not riding on the bearings. This meant the carriage wouldn't move smoothly. A little work with a Dremel and a file sorted that out.


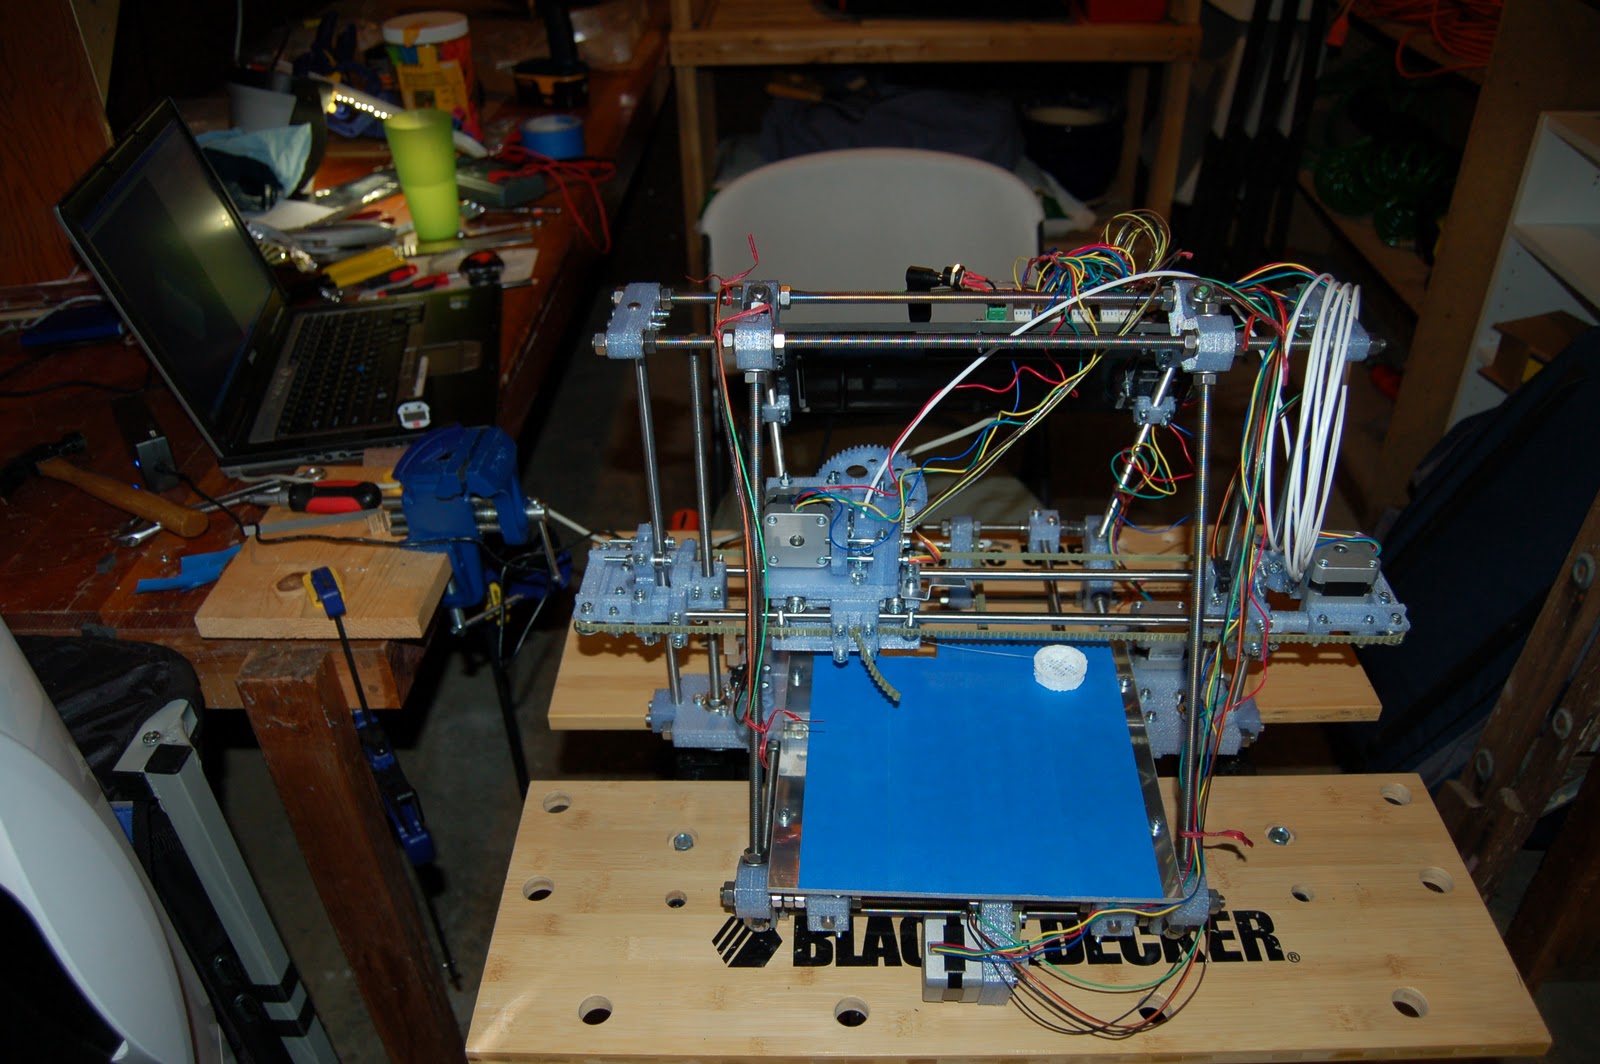
After: Finished Mendel with first print (and build devastation in workshop)
Another problem that I encountered was that one of the M8 trapped nut that the Z-axis rides on did not have it's threads cut correctly. This meant that one side of the Z-axis was very stiff. After completing the build I had to completely dismantle the Z-axis and replace the nut with a better made one. Next time I will check how the nut spins down the whole threaded rod before I trap it in the RepRapped parts.


Adventures in 3-D Printing

This blog is intended to document the various trials and tribulations I experience as I experiment with 3-D printing. I have built an open-source 3-D printer called a Mendel, see more here. It's built with Generation-6 electronics from Mendel-Parts, a single controller board that controls all the stepper motors and extruder.

The extruder is the latest geared stepper motor driven extruder but using drive gears printed on a commercial 3-D printer, also from Mendel-Parts.